Presented yesterday during I / O, the Android M has already begun to captivate potential users. There are several new that everyone wants to test and experience firsthand.
After Google have released the first versions of tests, making them available for any user to install them in any Nexus 5, 6 or 9, is time to be initiated the first tests.
This is not a complicated process and anyone can do it. So the Pplware will explain in detail what steps to take to install the Android M.
The new version of Android, M, is still in its infancy and so it is still prone to problems and behaviors less “normal”.
All those who want to use gift that should for now Google has not yet begun to focus on stability and is more focused on new functions and its development.
This installation will remove all data from the device and therefore should be made a full backup to protection of data
requirements
requirements for installing Android M are very simple. In accordance with that devices can use to is already limited to Nexus 5, 6, 9 and player.
In addition it is also necessary to have user side the respective image to be installed. These can be obtained from Google, through the links below:.
Once you download the picture of your Nexus must decompress it and put it in an easily accessible folder
To get put the Nexus in a state that can receive the Android M is required to have installed the ADB and fastboot.
For Windows simply install it here and OSX just running the following command in a terminal window
bash & lt; ( curl -s https://raw.githubusercontent.com/corbindavenport/nexus-tools/master/install.sh) |
Finally you must ensure that the smartphone is detected by the operating system.
Note that all commands to be executed below must be made or a window Dos, in the case of Windows, or a window Terminal, in the case of OSX.
This window / terminal should be open in the same folder where descomprimiram the image of Android M.
Unlock Bootloader
To start the installation process it is necessary to go to the Nexus bootloader For this run the following command:
This will be a quick command and will restart your Nexus . Then execute the following command:
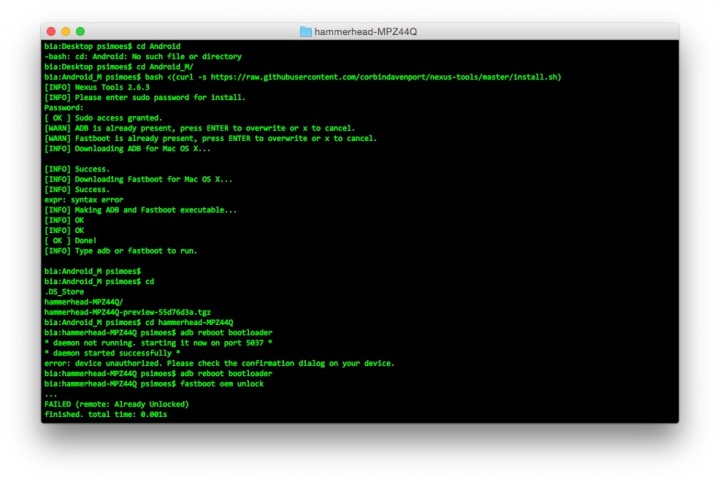
This is a longer command, but in the end should a correct execution message .
Install Android M
Now that the Nexus will be ready to receive the Android M, you just need to give the command for it to be transferred and installed. For this run the following command:
Windows
OSX
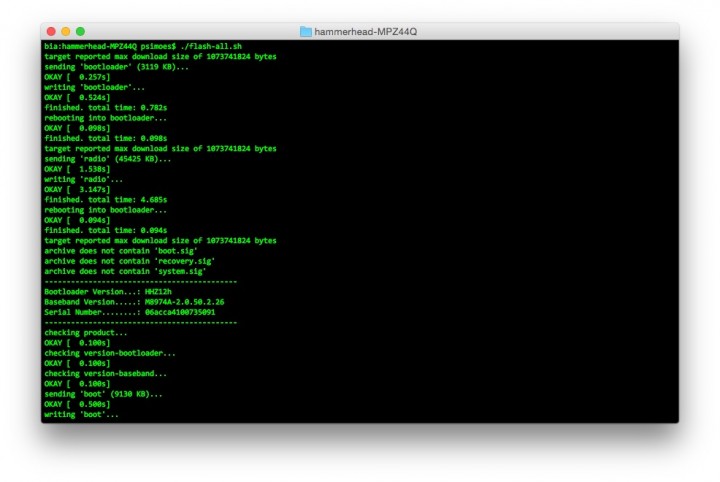
This is a command that will take much longer and that should not be interrupted for any reason. They can follow the installation procedure in the terminal window, where they will be presented the steps that are being run.
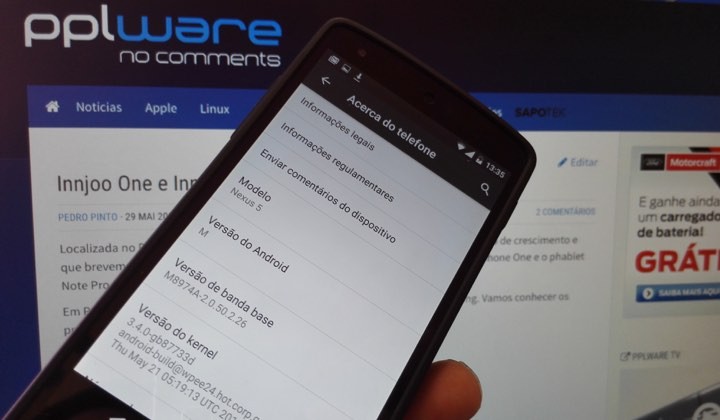
After a few minutes your Android will restart, lingering here too longer than the normal. The Android will end the current terminal configuration and prepare it for the next step.
This step is the user data configuration. After a few steps and a few minutes the Nexus will be ready to be used, as with the Android M.
Pplware is not responsible for any problems that arise in the equipment or the use of these instructions.
The samples were tested by our team and are fully functional.
No comments:
Post a Comment